Part 1: Create and deploy a website with Microsoft Azure web app service plan
Part 2: Configure a custom domain in Azure Web Apps
Part 3: Uploading to Azure Web Apps Using FTP
Part 4: Add and manage TLS SSL certificates on Azure Web App
While accessing my website hosted on Microsoft Azure Web App custom domain in chrome browser it was showing not secure, it means it is only using HTTP protocol and SSL certificate deployed, Next I wanted to add SSL certificate on the website so it can be worked on HTTPS port and it will show lock icon as secure.
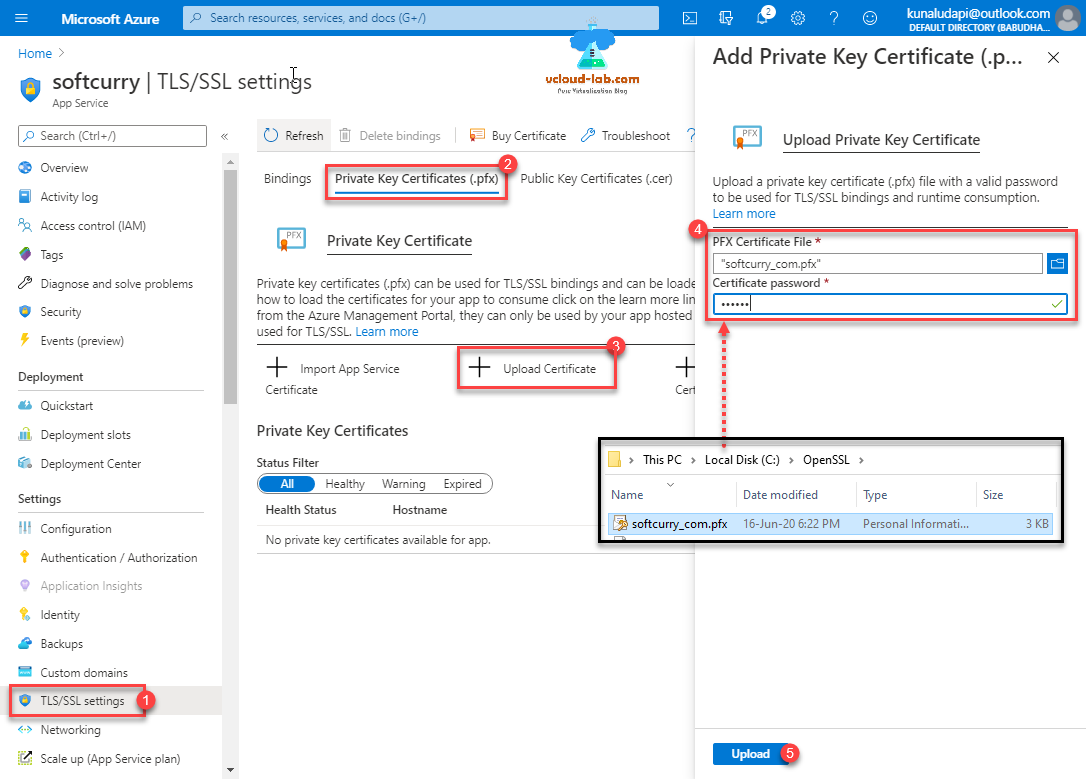
To proceed first make sure you have your SSL certificate in private key certicicate .pfx format extension (pfx combines private key and certificate). Go to Web App >> TLS/SSL settings >> Private Key Certificates (.pfx) >> + Upload Certificate. I already have my PFX certificate file ready which I am uploading and providing certificate password, press upload button.
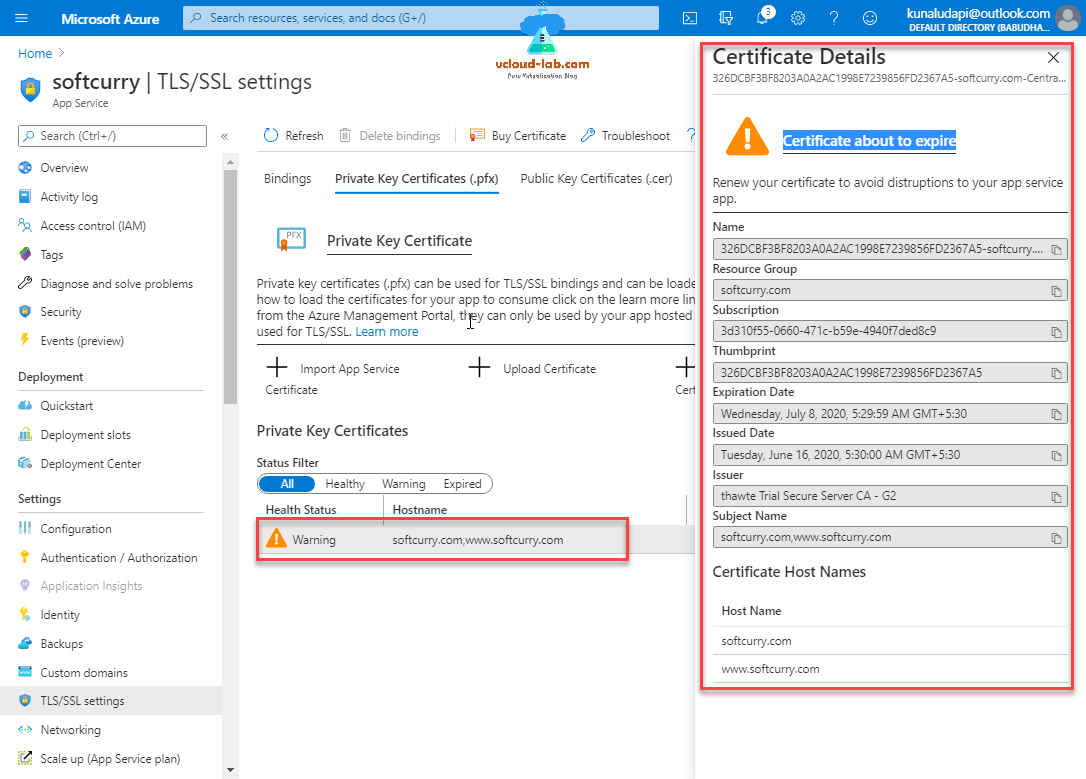
Once certificate is uploaded and validated successfully It will show in the list with basic, you can click the certificate and check the complete details. I am getting warning message because it was generated long back and about to expire in few days.
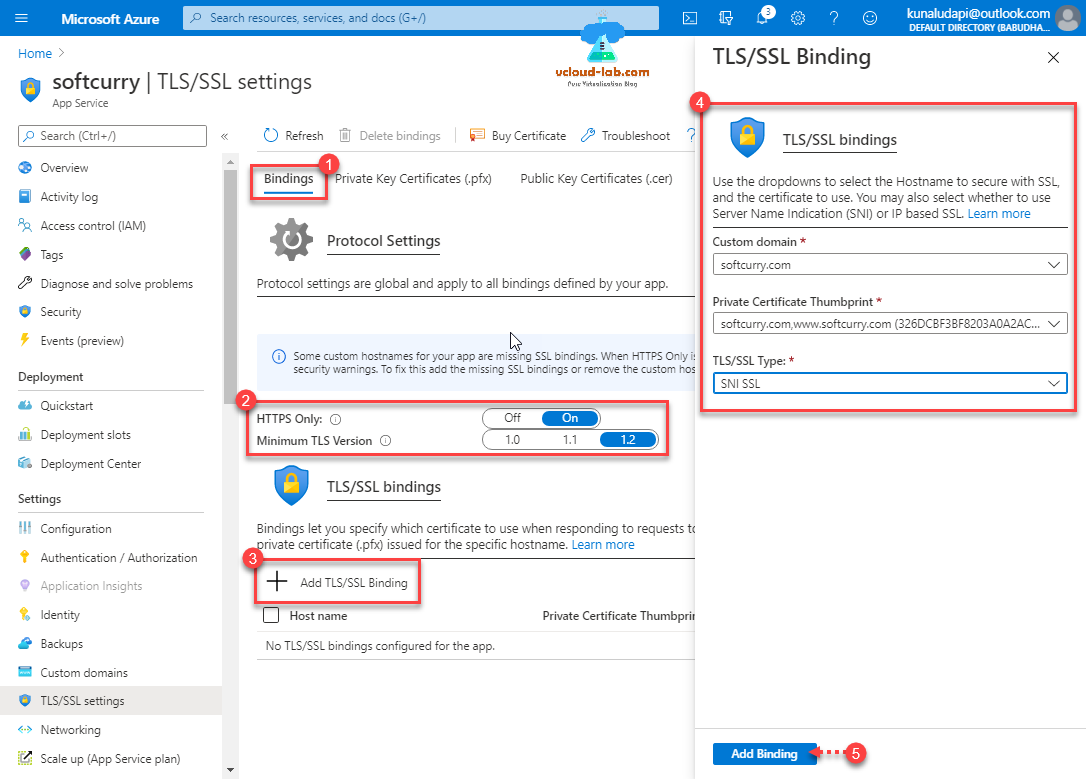
Next go to Bindings tab, under Protocol Settings change port to HTTPS only to On and Minimum TLS version to 1.2 to make web application more secure over the internet (TLS stands for Transport Layer Security, which is a cryptographic protocol used to increase security over computer networks. TLS is the successor of SSL although is sometimes still referred to as SSL). Press + Add TLS/SSL Binding, from dropdown select custom domain hostname and choose Private Certificate Thumbprint earlier uploaded, then choose TLS/SSL type to SNI SSL (SNI, or Server Name Indication, is an addition to the TLS encryption protocol that enables a client device to specify the domain name it is trying to reach in the first step of the TLS handshake, preventing common name mismatch errors.). Click Add binding button.
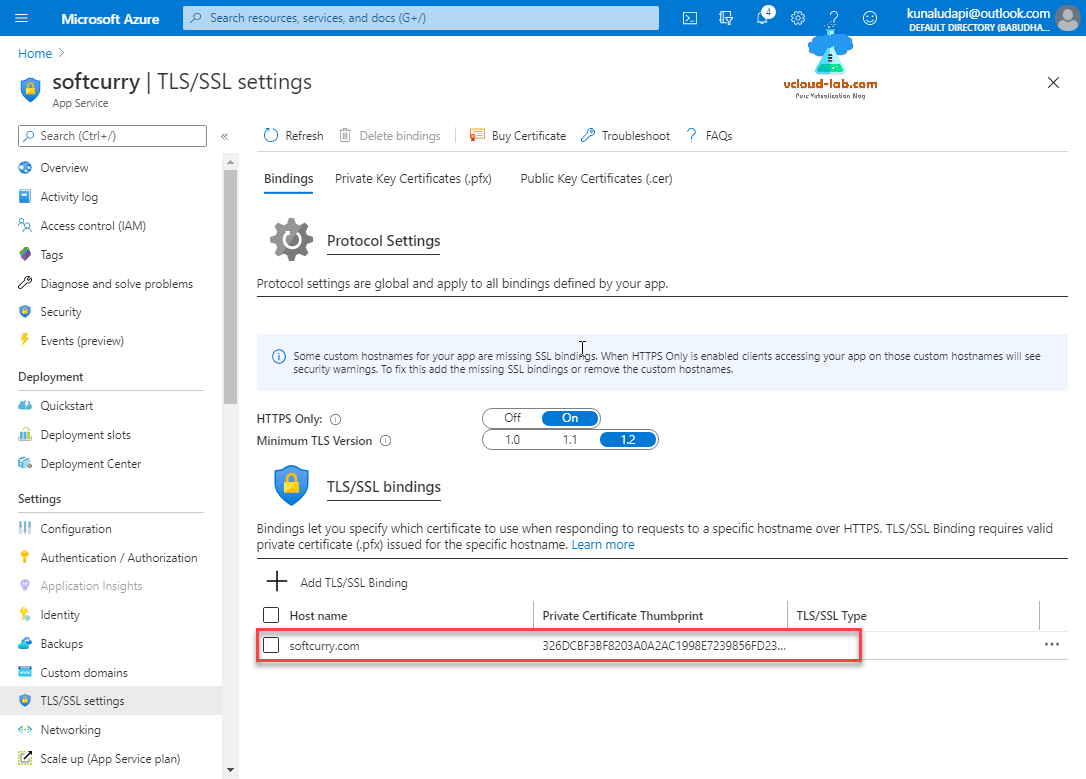
Binding is added and it looks good.
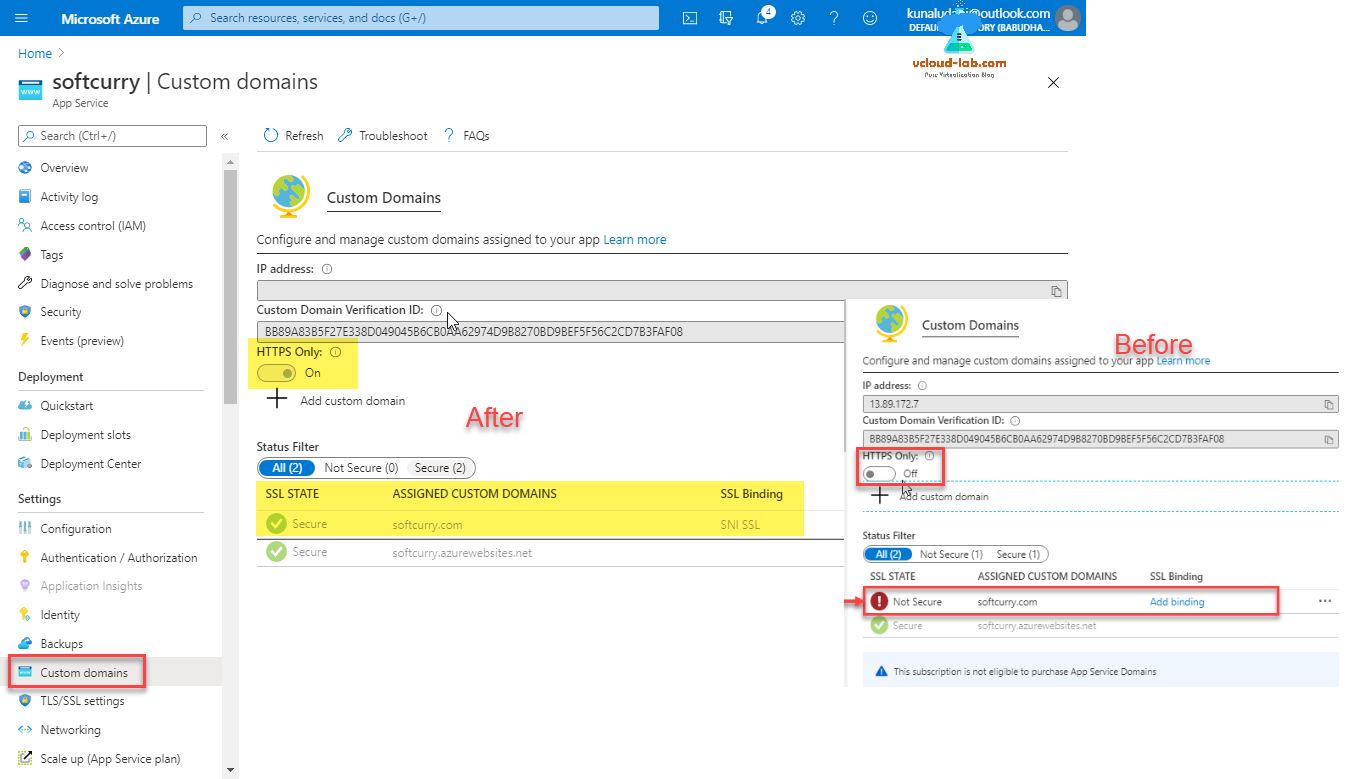
You perform the same task of adding SSL certificate binding from Custom domains view as well, here is the screenshot how it looks before and after changing the settings for HTTPS only and SSL binding.
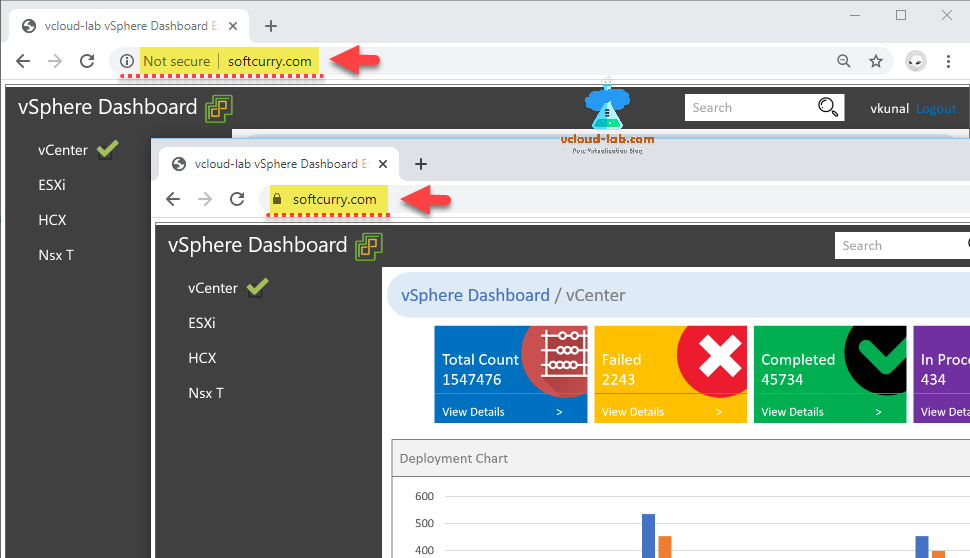
Once certificate is added to website in Azure, Its time to test it, I see there is lock appear beside url after and it is using secure SSL HTTPS protocol co connect.
Useful Articles
Install and configure certificate authority (CA) on Microsoft Windows server with Group Policy
Azure azcopy login error Selected user account does not exist in tenant 'Microsoft Services' and cannot access the application '579a7132-0e58-4d80-b1e1-7a1e2d337859'
AzCopy copy transfer fails with 403 This request is not authorized to perform this operation using this permission
PART 1 : MICROSOFT AZURE CREATION AND CONFIGURATION OF VPN TUNNEL SERIES
PART 2 : MICROSOFT AZURE CREATING RESOURCE GROUP
PART 3 : MICROSOFT AZURE CREATING AND ADMINISTERING VIRTUAL NETWORK (VNET)
PART 3.1 : MICROSOFT AZURE POWERSHELL CREATING AND ADMINISTERING VIRTUAL NETWORK (VNET)
PART 4 : MICROSOFT AZURE CREATING AND ADMINISTRATING LOCAL NETWORK GATEWAY VPN
PART 4.1 : MICROSOFT AZURE POWERSHELL CREATING AND ADMINISTRATING LOCAL NETWORK GATEWAY
