I wrote this article as a first part of a Configuring and creating VMWare virtual machine template using HashiCorp Packer.exe. While automating and installing unattended Microsoft Windows VM template on VMWare vCenter Server using packer I was facing few challenges such as it was getting stuck and freeze on Waiting for IP. It was not moving beyond IP point. It happens because VMware Tools are not installed. To resolve this issue I had to inject or slipstream VMWare tools inside Microsoft Windows Server OS ISO file, Which will automatically install it once OS installation is completed.
Part 1: Inject and install VMware Tools During Install by modifying Microsoft Windows ISO
Part 2: Configure IIS server to allow download .ISO files
Part 3: Using HashiCorp Packer to build a Windows Server VM template for VMware vSphere
As a first step I have downloaded Microsoft Windows Server ISO from https://www.microsoft.com/en-us/evalcenter/download-windows-server-2022. It is an evaluation ISO copy.
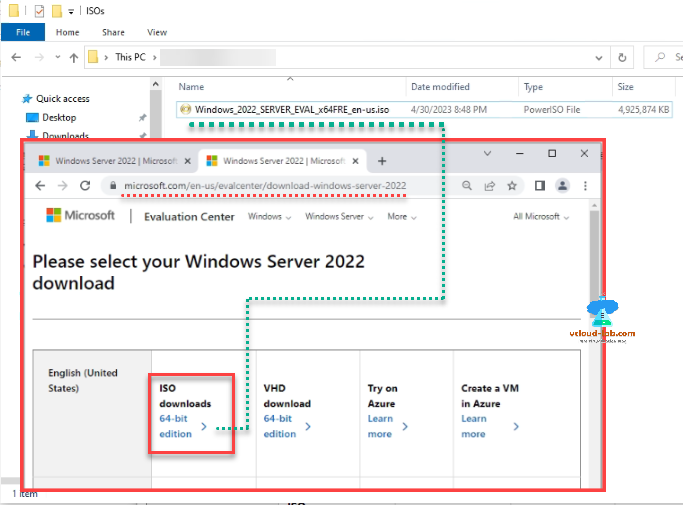
Right click downloaded Windows OS ISO file and click Mount. Next Open the selected file.

Open PowerShell as an Administrator. Run below two commands to create 2 folders ExtractedISO and MountWim under C:\Temp directory on the system. Verify folders are created and Make note of folder name spellings.
mkdir C:\Temp\ExtractedISO -Force
mkdir C:\Temp\MountWim -Force

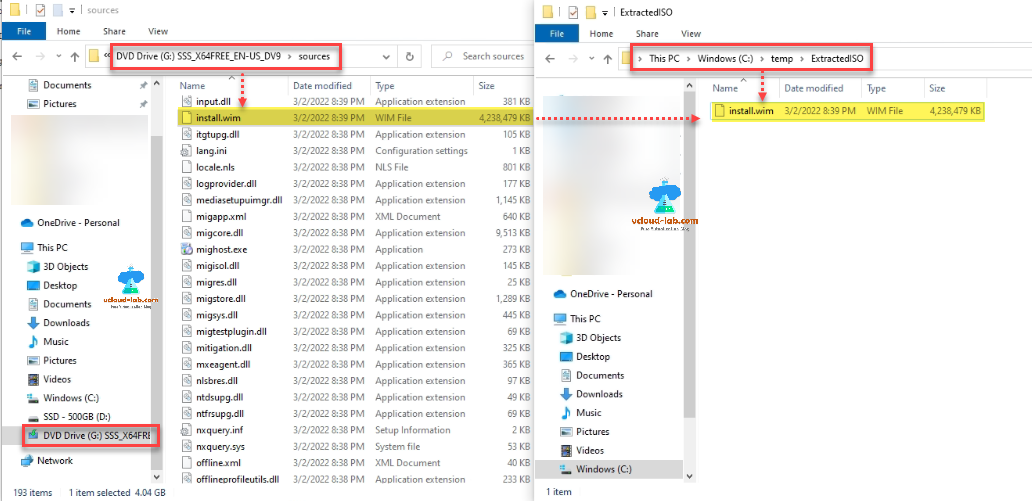
Next go to mounted drive of Windows OS Server ISO file under This PC. Expand mounted drive (In your case drive letter will be different). Inside Sources folder find file name install.wim and copy to C:\temp\ExtractedISO folder.
If incase PowerShell is closed. Open it with as an Administrator again. and type below command to view available edition flavors of Windows OS such as standard or datacenter (Desktop experience GUI).
I will use dism.exe. DISM is Deployment Image Servicing and Management tool. Deployment Image Servicing and Management (DISM) is a command-line tool utility that is used to service/modify Windows images. You can use DISM image management commands to mount and get information about Windows image (.wim) files and modify it, Full-flash utility (FFU) files, or virtual hard disks (VHD).
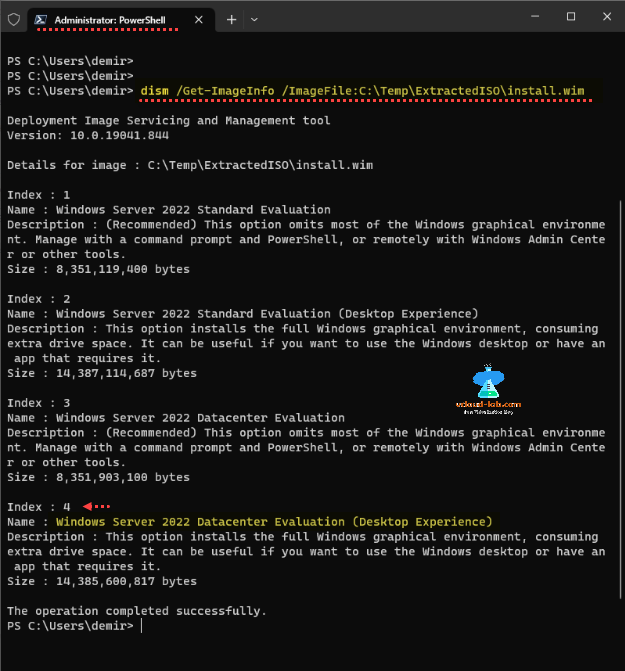
dism /Get-ImageInfo /ImageFile:C:\Temp\ExtractedISO\install.wim
I have 4 editions available in current Windows Server ISO, I am going to use last index 4 in next command, which is Windows Server 2022 Datacenter Evaluation (Desktop Experience). Make sure your command always ends with the operation completed successfully.
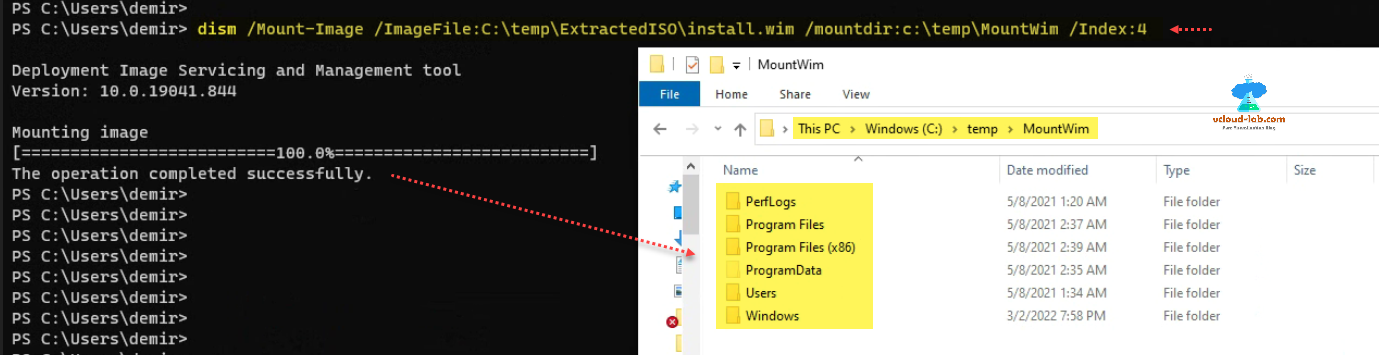
In the following command mount copied install.vim file under folder C:\temp\ExtractedISO under directory C:\temp/MountWim with below command.
dism /Mount-Image /ImageFile:C:\temp\ExtractedISO\install.wim /mountdir:c:\temp\MountWim /Index:4
Once install.wim is mounted you can view the folder structure under MountWim folder. This resembles to the same folder structure of Windows on C drive. Here mounting image is succeeded in the end.
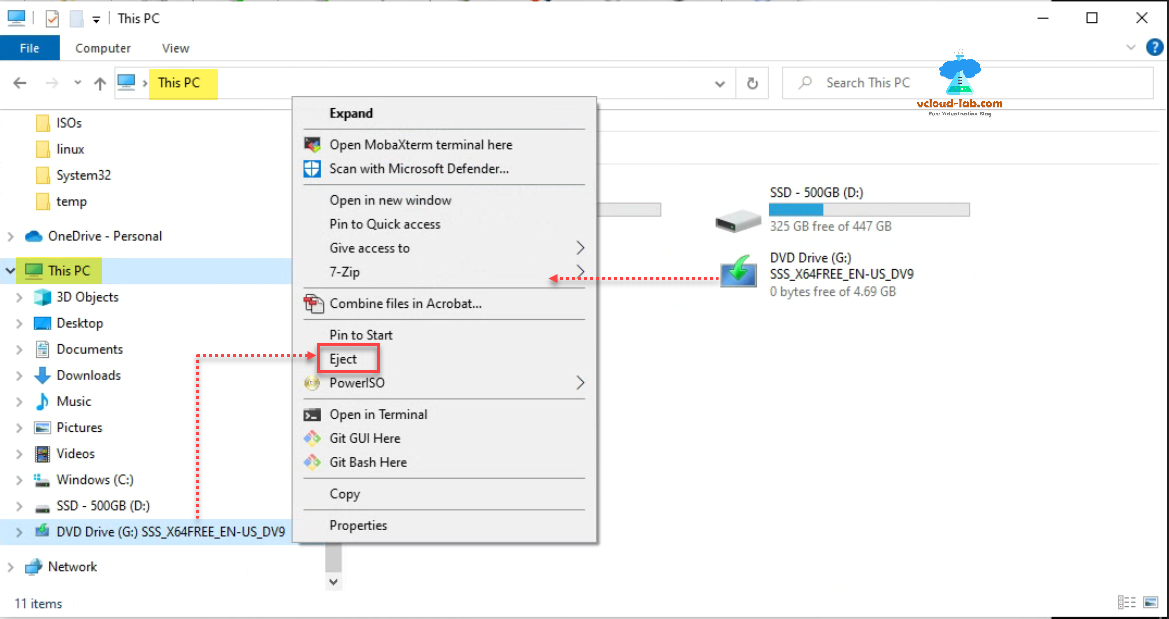
Go to This PC drives, right click the DVD ISO image mounted earlier. Right click on it and click Eject to unmount OS ISO file.
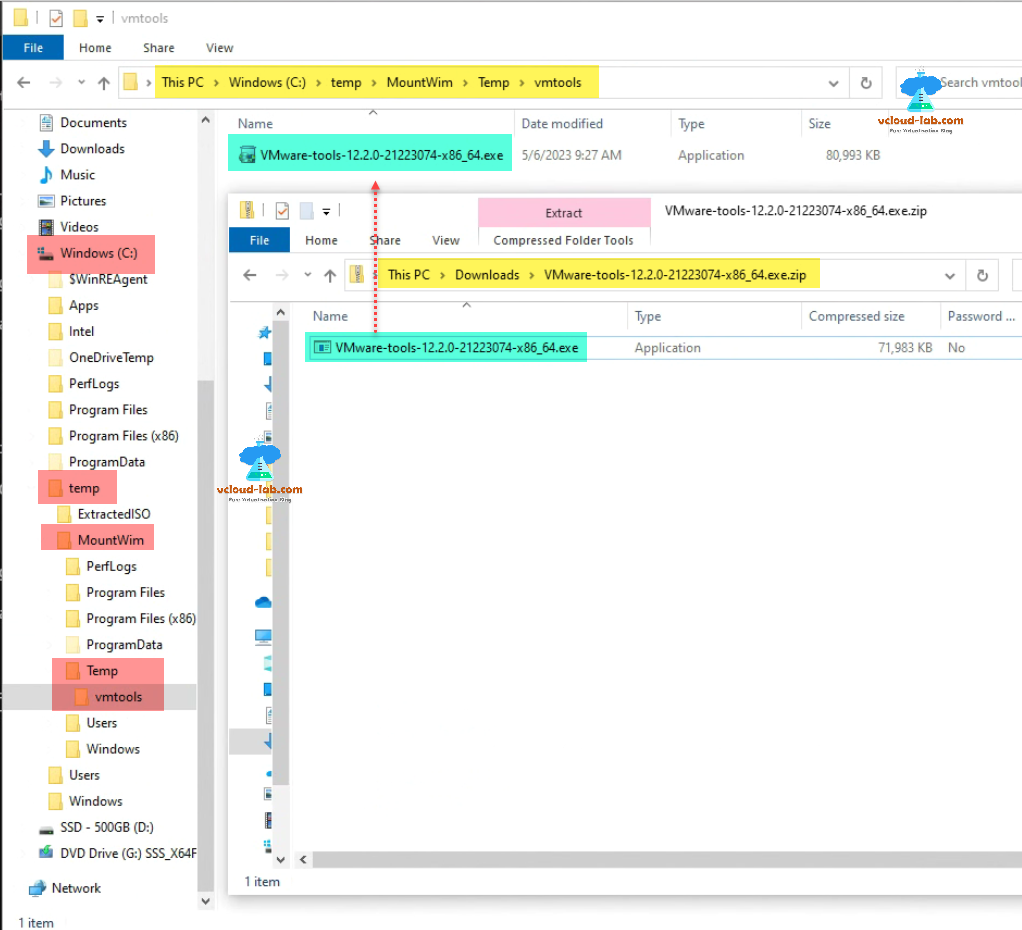
Download latest VMware Tools from VMware Customer Connect Website https://customerconnect.vmware.com/en/downloads/details?downloadGroup=VMTOOLS1220&productId=1259&rPId=102595. You can either download zip or ISO file. Extract exe file, in my case I am using 64 bit executable exe file. (In the ISO file there is Setup64.exe file, which you can use). Create a new folder structure as like C:\Temp\MountWim\Temp\vmtools.

Extract/Copy exe file under C:\temp\MountWim\Temp\vmtools as shown below.
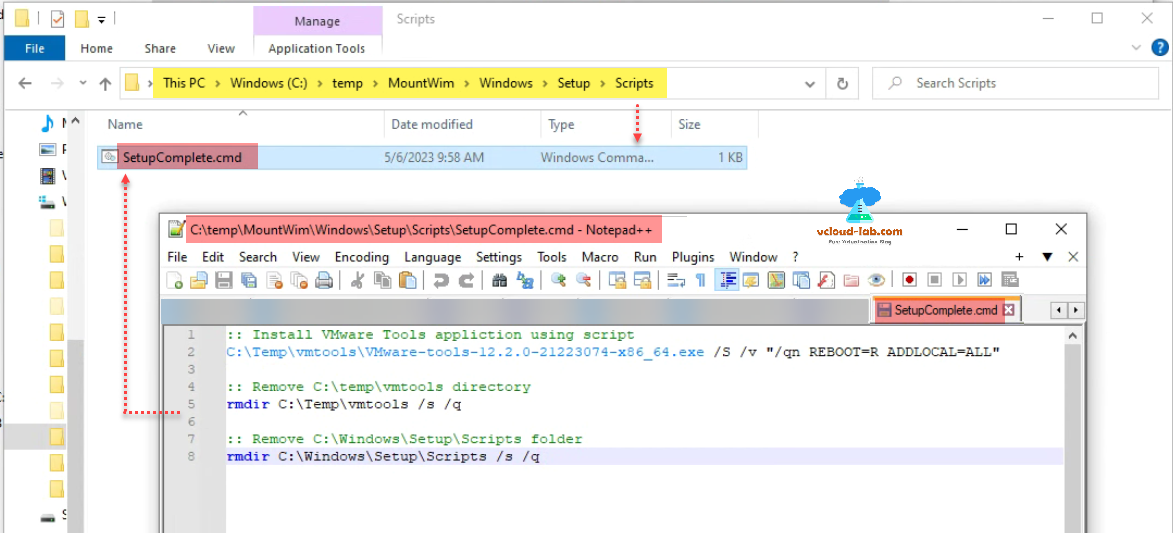
Following step is very crucial and has to be very accurate. Cmd script file name has to be same. I have created a folder and file under C:\temp\MountWim\Windows\Setup\Scripts\SetupComplete.cmd. SetupComplete.cmd content has to be as below. Check VMWare Tools exe file name and modify your script and tools version accordingly.
:: Install VMware Tools application using script
C:\Temp\vmtools\VMware-tools-12.2.0-21223074-x86_64.exe /S /v "/qn REBOOT=R ADDLOCAL=ALL"

:: Remove C:\temp\vmtools directory
rmdir C:\Temp\vmtools /s /q

:: Remove C:\Windows\Setup\Scripts folder
rmdir C:\Windows\Setup\Scripts /s /q
- %WINDIR%\Setup\Scripts\SetupComplete.cmd: This script runs with local system permissions and starts immediately after the user sees the desktop. This setting is disabled when using OEM product keys, except on Enterprise editions and Windows Server operating systems.
- %WINDIR%\Setup\Scripts\ErrorHandler.cmd: This script runs automatically when Setup encounters a fatal error. It runs with local system permission.
Above script will install VMware Tools in an unattended mode once Windows Operating system installation is completed and will remove directory and its content from C:\Temp\vmtools and C:\windows\setup\script which is not required once the installation is completed and finished.
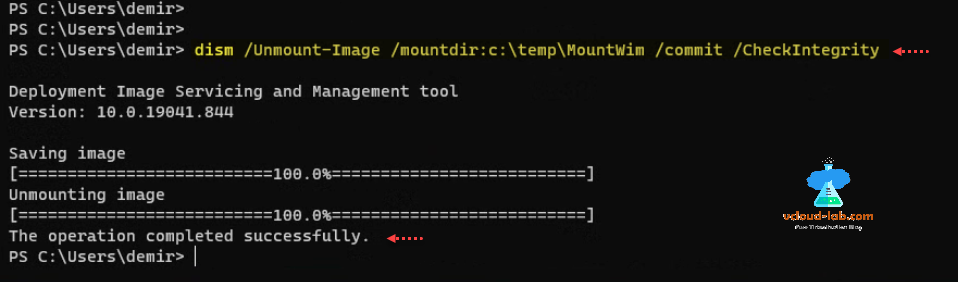
New setup is ready with newly modified install.wim, Unmount the install.wim mounted folder using below command.
dism /Unmount-Image /mountdir:c:\temp\MountWim /commit /CheckIntegrity
This is ready for 4th index only inside install.wim. If you are planning to use other editions, you will need repeat same steps to configure other indexes (editions) one by one furthermore.
My install.wim is modified and ready. To inject this install.wim in Windows Server ISO file you can use your choice of ISO application. I am using PowerISO here to replace Install.Wim inside /sources and modify my Windows Server ISO file. I have installed PowerISO on my system.
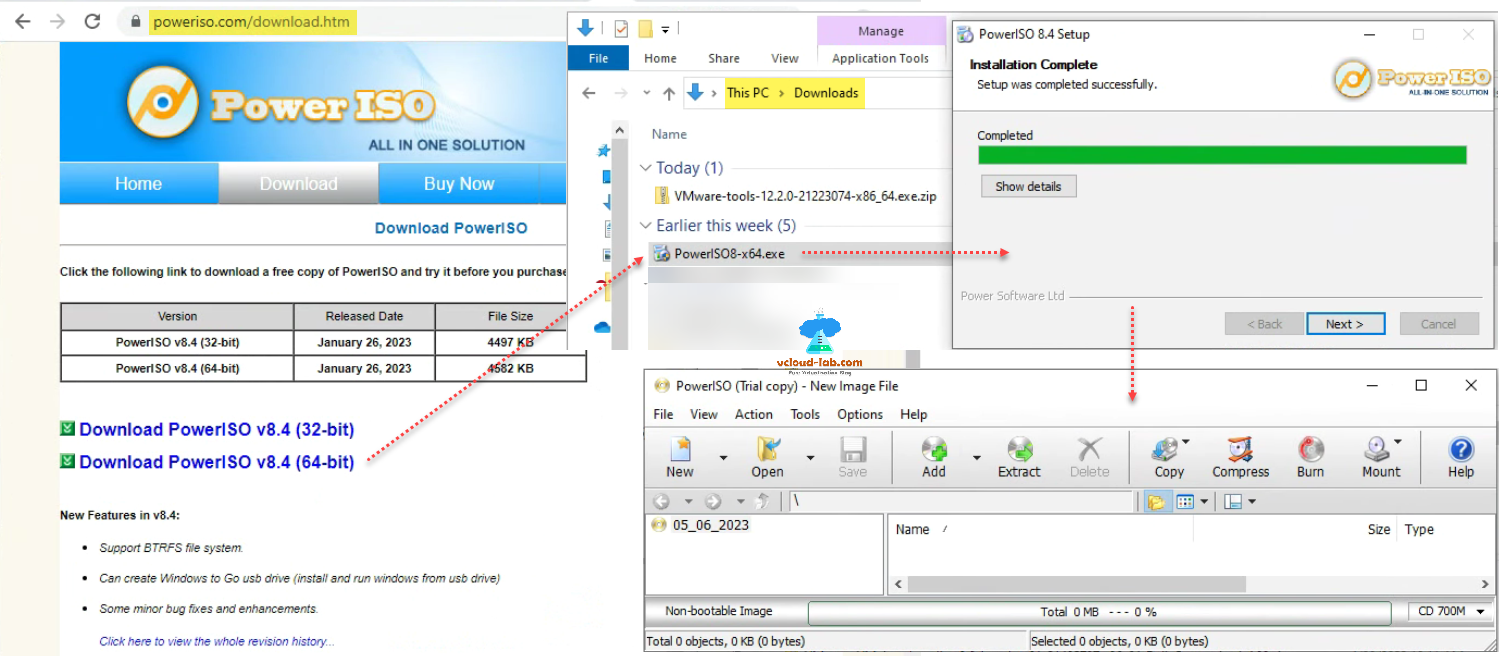
Open Windows server OS ISO file in PowerISO application.
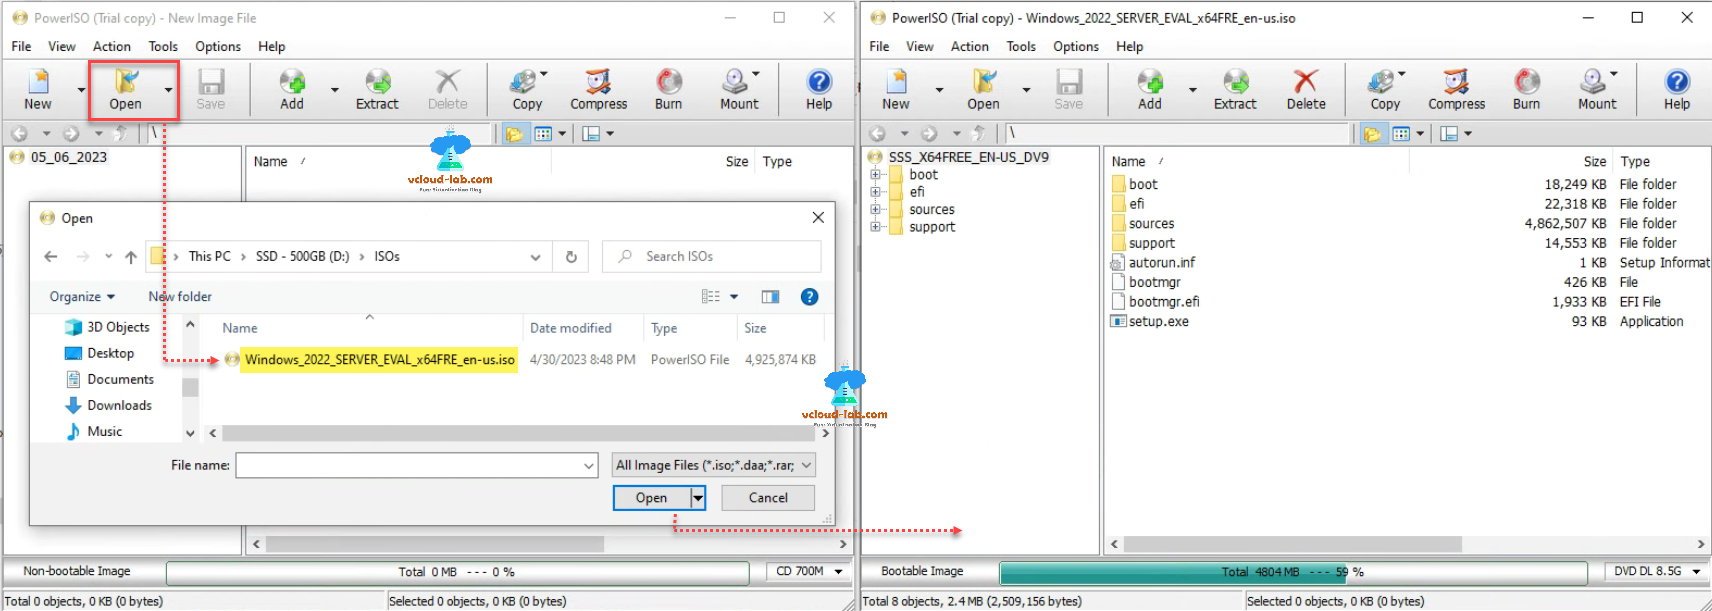
Drag and drop install.wim file inside /sources folder on PowerISO. It shows the message that the file and folder name already exists. Do you want to overwrite it? Verify the summary what will replace with what and click Yes.

Go to File Menu, from drop down click Save as option. Provide a new name to new ISO file and save.

It is time to test the New ISO. I have used it on VMware Virtual Machine Console connecting/mounting ISO and Installed OS. After Installation all looks good VMware Tools are installed with the OS.

If incase you want to use free version of ISO, You can use imgBurn. you need to download and install ImgBurn.
- Open ImgBurn and choose the option "Create image file from files/folders."
- Go to the Advanced tab and click on the Bootable Disc option.
- Locate the Source box and click on the browse icon. Find the folder containing the extracted ISO file and the additional files you want to add.
- Select a destination to save the new bootable ISO file by clicking the browse icon next to the Destination box. Choose a location and provide a name for the ISO file.
- In the Bootable Disc tab, choose the option "Make Image Bootable." Set the Emulation type as None (Custom) and enter 8 (or 4 for Vista ISO) in the Sectors To Load box.
- Locate the Boot Image box and click on the browse icon. Navigate to the Boot folder within the newly created folder and select the file named etfsboot.com. Click Open.
- Click the Build button to start building the bootable ISO image file. When prompted, click Yes or OK in the dialog boxes to proceed.
- After the process is complete, you will have two ISO files. Upload the one that has the proper size, not the smaller one.
- Mount the ISO file to a virtual machine and test the installation of each option to ensure they all work correctly.
- If everything is functioning as expected, you're done!
Useful Articles
Deploy install VCSA (vCenter server appliance 6.5) on VMWare Workstation
Enable or disable SSH on VMWare vCenter Server Appliance (VCSA)
The top 10 reasons to upgrade to VMware vSphere 6.5
vCenter server appliance 6.5 deployment Error The supplied system is not valid
How to deploy vCenter server appliance on VMware Workstation
Enable Access to the VCSA Bash shell or Appliance Shell
Patching the vCenter Server Appliance VCSA
Install and Configure VMware UMDS on Linux
How to Install vCenter server appliance on ESXi host
