Generate new self-signed certificates for ESXi using OpenSSL
Push SSL certificates to client computers using Group Policy
Replacing a default ESXi certificate with a CA-Signed certificate
Troubleshooting replacing a corrupted certificate on Esxi server
How to import default vCenter server appliance VMCA root certificate and refresh CA certificate on ESXi
How to replace default vCenter VMCA certificate with Microsoft CA signed certificate
Managing ESXi SSL certificate properties from vCenter server
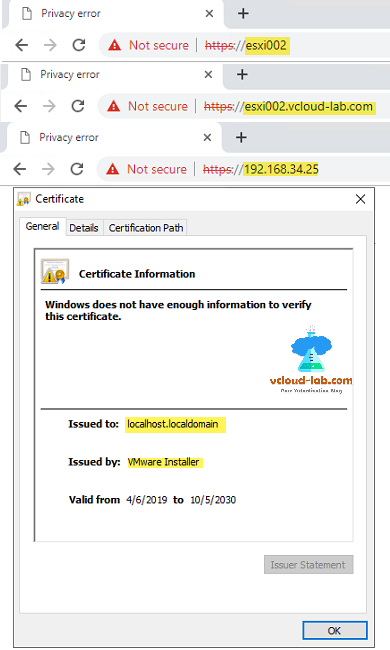
I was testing and designing a virtual infrastructure for a my new project and after basic reviews done by security team they suggested and wanted to have certificates deployed on vmware esxi server, Deploying ssl certificates is a one of the main and must have security best practice. I required additional infrastructure ie: vCenter or CA authority server or ssl cert from third party vendor and which was not in place because my team was at building infrastructure state and CA server vCenter server was in deployment in progress phase. For the time being I wanted to test generated self signed ssl certificates using OpenSSL. This was going to help me on temporarily basis as all the administrator were going to use jump server to access esxi server web UI urls and I could use that jump server to deploy trusted certificates. On the fresh vsphere esxi server you will find self signed certificate by default issued by VMware Installer and issued to localhost.localdomain, When you check it on the browser it will show as not secure on browser.
To use SSL certificate on esxi below are the requirements. Certificate should meet following criteria.
- x509 version 3
- For root certificates, the CA extension must be set to true, and the cert sign must be in the list of requirements.
- Key size: 2048 bits or more (PEM encoded)
- PEM format. VMware supports PKCS8 and PKCS1 (RSA keys). When keys are added to VECS, they are converted to PKCS8.
- CRT format
- Start time of one day before the current time.
- CN (and SubjectAltName) set to the host name (or IP address) that the ESXi host has in the vCenter Server inventory.
- SubjectAltName must contain DNS Name=<machine_FQDN>.
- Contains the following Key Usages: Digital Signature, Non Repudiation, Key Encipherment
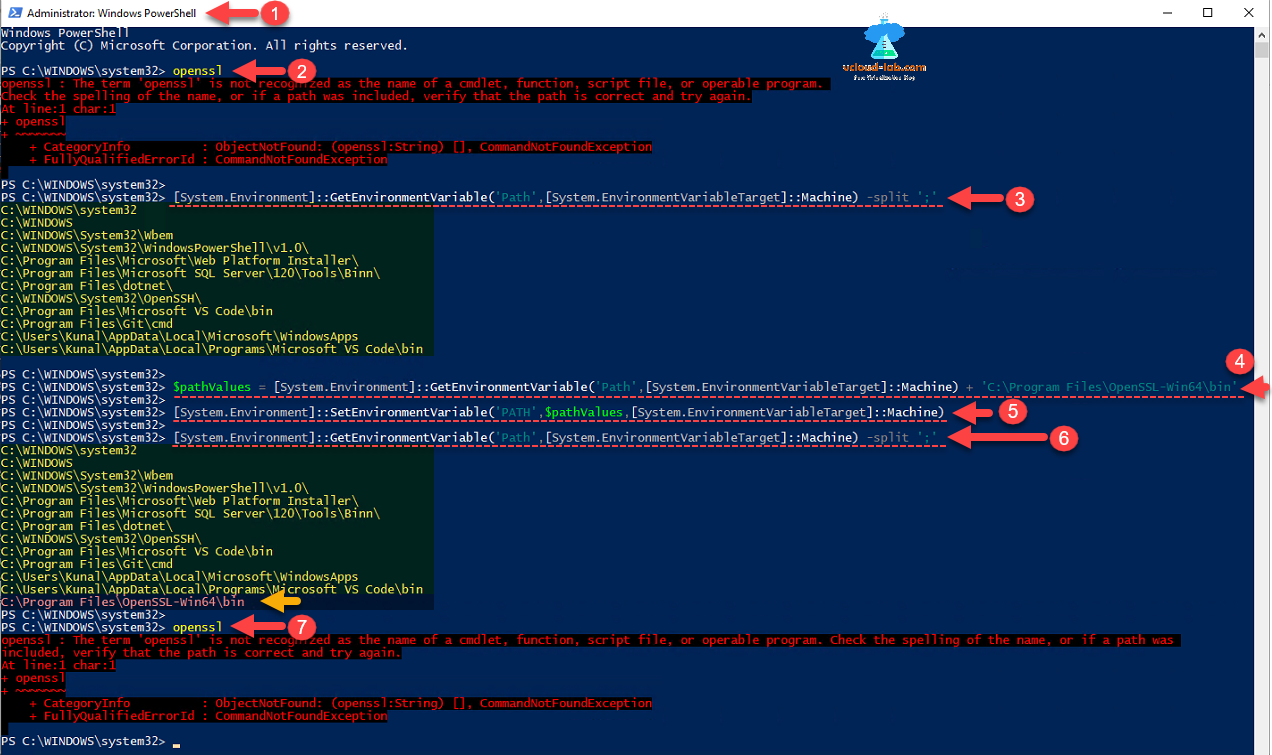
This will be complete step by step guide on setting up openssl environment so I will be showing how to configure openssl as well, I used open source openssl tool to create these self signed certificates. I have downloaded and installed openssl tool from https://slproweb.com/products/Win32OpenSSL.html. Installation step are just keep pressing next button with all the default until press finish. Open powershell as administrator conosle, and try to run openssl command, it will simply run with error, openssl: the term is not recognized as the name of a cmdlet, function, script file, or operable program., for this we need to setup an environment to run openssl work correctly. When I installed latest version of openssl, its default installation location was 'C:\Program Files\OpenSSL-win64\bin'. Next I added same path to the environment variable using below command. There are total 3 targets Machine, Process and User you can add env.
This command shows the current path list.
[System.Environment]::GetEnvironmentVariable('Path',[System.EnvironmentVariableTarget]::Machine) -split ';'
I added and constructed 'C:\Program Files\OpenSSL-win64\bin' with existing path list, using next command.
$pathValues = [System.Environment]::GetEnvironmentVariable('Path',[System.EnvironmentVariableTarget]::Machine) + 'C:\Program Files\OpenSSL-win64\bin'
Running below command configures machine level environment variable.
[System.Environment]::SetEnvironmentVariable('Path',$pathValues,[System.EnvironmentVariableTarget]::Machine)
Recheck the running earlier command, the new path will be showing in the bottom.
[System.Environment]::GetEnvironmentVariable('Path',[System.EnvironmentVariableTarget]:Machine) -split ';'
If you try to run openssl, it gives same error message, for this you will need to close current console and reopen PowerShell as Administrator.
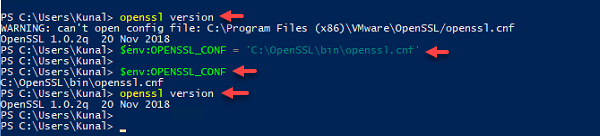
After opening PowerShell as administrator, in case if you have downloaded openssl from any other source. while running openssl you might see warning message with WARNING: can't open config file: <folder location>openssl.cnf. Basically you will find openssl.cnf file in same location or in sub folders (I had kept my cnf file in different location), and you need openssl to know what is the location of file, you can map the same in environment variable or temporarily add using below command. Once you close powershell, you will have to again type and run this command, its better to add it to machine or user Environment variable permanently.
$env:OPENSSL_CONF = '<Path to cnf file>\openssl.cnf'
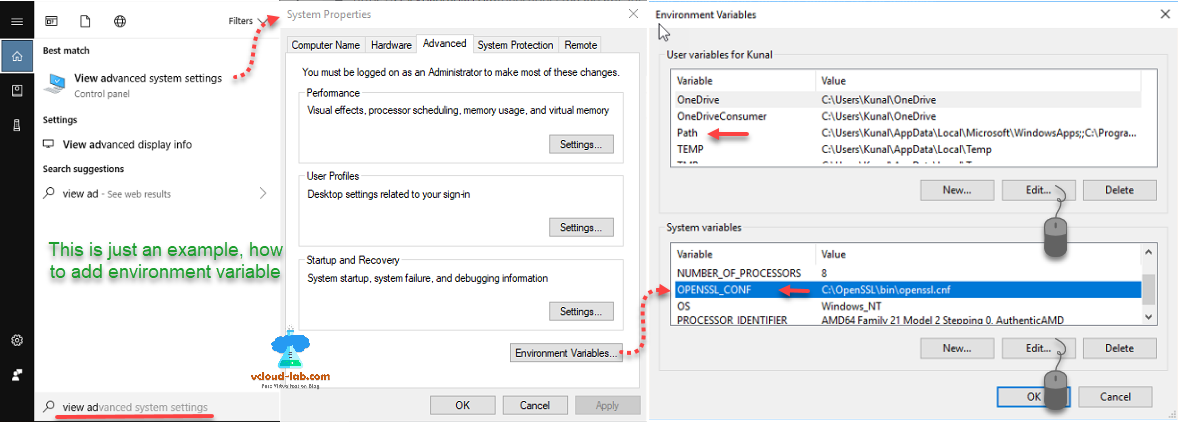
This is my screenshot of Environment Variables and to launch it, go to under Cortana search > View advanced system settings >> System Properties >> Advanced tab >> Environment Variables button and choose system variables add information for editing path search from list and press edit button to modify.
 I will check openssl command again on new powershell console, it runs perfectly and don't show any error.
openssl version
I have already created a esxi information file named esxi002.cnf and stored it in c:\temp\cert, where all my certificates will be created. I just change the directory location to cd c:\temp\cert\ on powershell console, below are the contents of my esxi002.cnf file and you need to modify information provided in bold font. Same has been shown in screenshot below.
I will generate a new 2048 private key, The 2048-bit SSL certificate and private key (server) is called an asymmetrical key pair. This means that one key is used to encrypt data (the public key/SSL certificate) and the other is used to decrypt data (the private key stored on the server), next generating a private key using command below.
openssl genrsa -out rui.key 2048
Successful output should be similar to: Generating RSA private key, 2048 bit long module (2 primes) ...........................++++...................++++ e is 65537 (0x010001)
When I run dir I can see new file rui.key is created, this private key is required for later steps and need to upload on esxi in the last, it is also used in next steps to generate csr and crt certificate files.

Create a new CSR file now, A CSR or Certificate Signing request is a block of encoded text that is given to a Certificate Authority when applying for an SSL Certificate. It is usually generated on the server where the certificate will be installed and contains information that will be included in the certificate such as the organization name, common name (domain name), locality, and country.
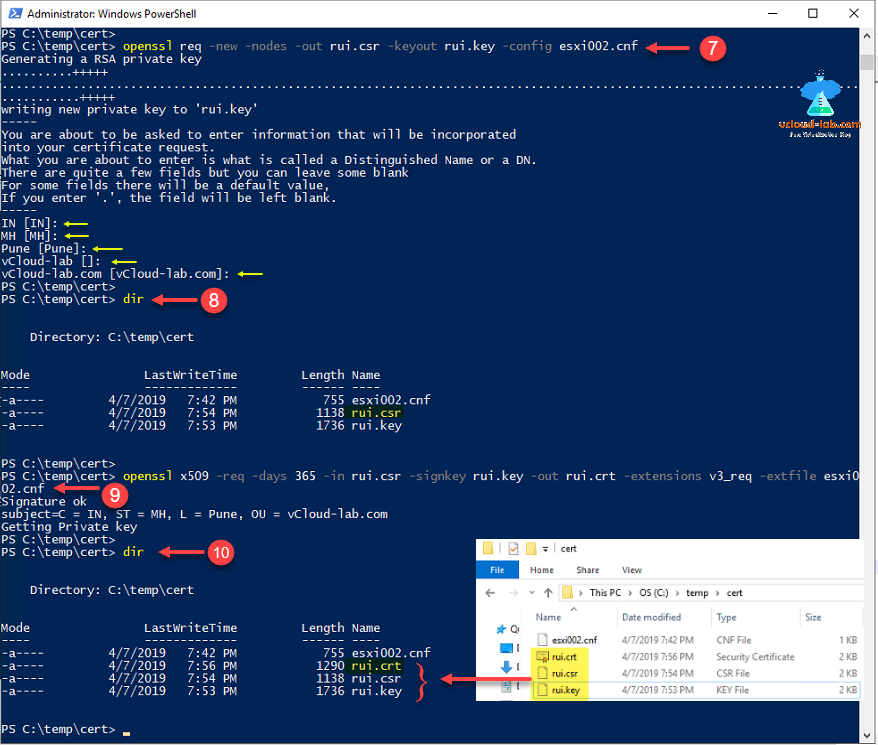
openssl req -new -nodes -out rui.csr -keyout rui.key -config esxi002.cnf
Provide new info or just press enter on to take default when prompted as we have already provided this information in esxi002.cnf file. run dir command and you will see new file rui.csr. Next command is crucial and last one to generate CRT file. CRT is a file extension for a digital certificate file used with a web browser. CRT files are used to verify a secure website's authenticity, distributed by certificate authority (CA) companies such as GlobalSign, VeriSign and Thawte. Below command create version v3 CRT file using key and CSR.
openssl x509 -req -days 365 -in rui.csr -signkey rui.key -out rui.crt -extensions v3_req -extfile esxi002.cnf
When checked on the cert folder, I can see all my required files, Out of which I will only require rui.key and rui.crt for next steps.
You can directly double click rui.crt or run below command to check certificate properties to review whether all the information is correct.
openssl x509 -in rui.crt -text -noout

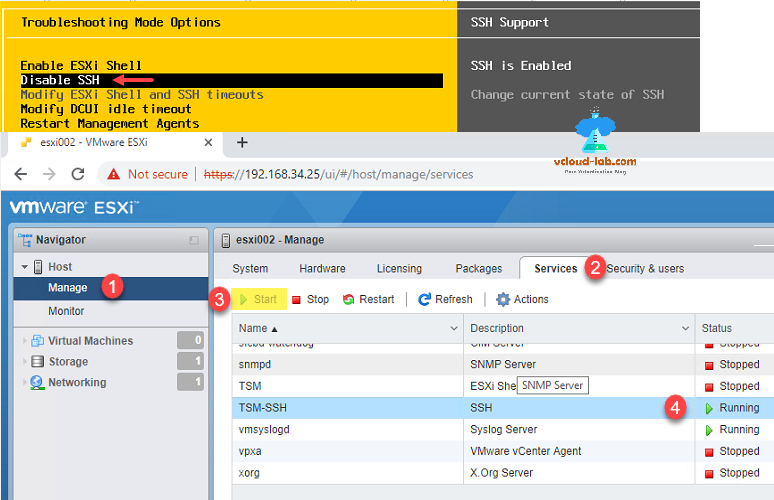
All the task related to creating self signed has been completed, and I will not use openssl for further steps. Next enable SSH on esxi through going to DCUI >> Troubleshooting Mode Options >> Enable SSH or if you are using esxi ui web access choose host >> Manage >> Services >> Select TSM-SSH and press Start button. Make sure ssh service running.
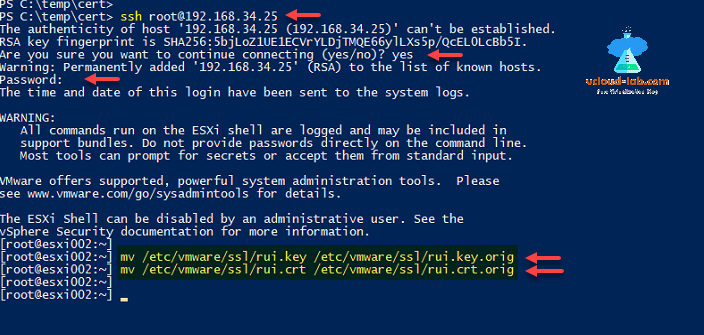
Put server in the maintenance mode. Next I am using Windows 10 inbuilt ssh client to connect to esxi server, you can use putty or other your choice of tool. Running below command prompts for password to connect esxi server.
ssh root@192.168.34.25
All the esxi certificate stored under location /etc/vmware/ssl, and certificate names are rui.key and rui.crt, I will just rename it as below.
mv /etc/vmware/ssl/rui.key /etc/vmware/ssl/rui.key.orig
mv /etc/vmware/ssl/rui.crt /etc/vmware/ssl/rui.crt.orig
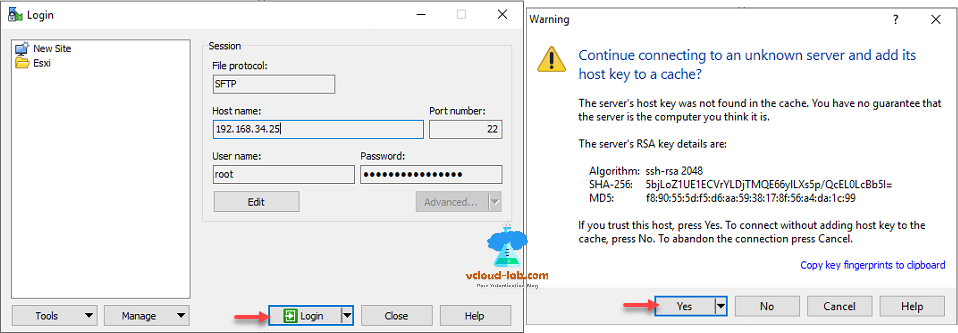
If you don't like command line tool, you can make use and perform same steps using winscp tool, Login to the server and accept continue, connecting esxi server by pressing yes.
Here I went to location /etc/vmware/ssl on esxi on the right side and can view files which were renamed before and after.
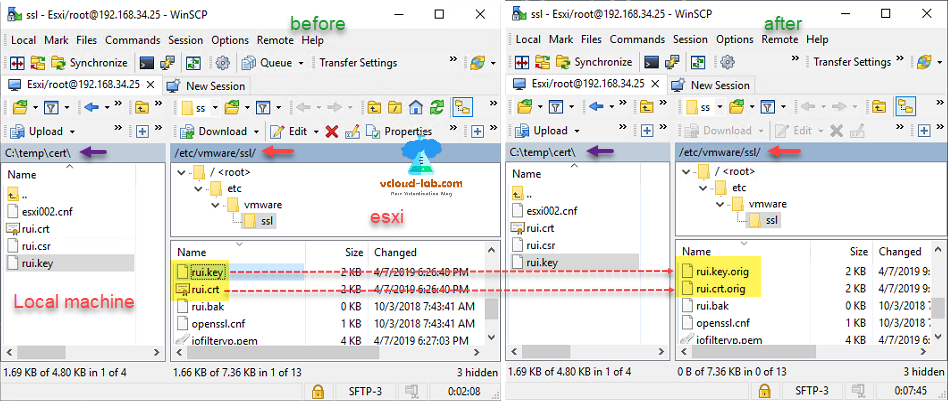
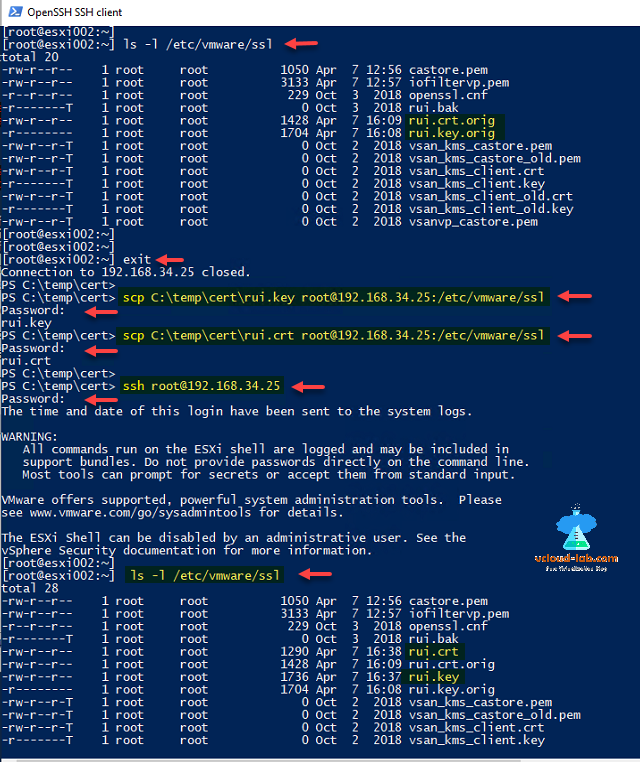
You can verify same results on ssh console by running command, that file names has been changed
ls -l /etc/vmware/ssl
Next type exit to come out of esxi ssh session and use scp commands to copy files from local c:\temp\cert folder to remote esxi folder /etc/vmware/ssl, both the times it will ask for password.
scp C:\temp\cert\rui.key root@192.168.34.25:/etc/vmware/ssl
scp C:\temp\cert\rui.crt root@192.168.34.25:/etc/vmware/ssl
In the last connect ssh to esxi and verify by listing files on esxi running below command, All should be good now.
ls -l /etc/vmware/ssl
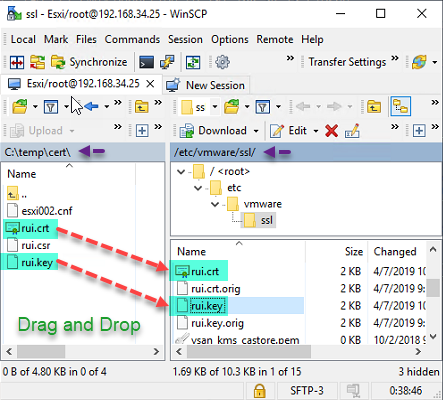
By refreshing folder on winscp I can see same results. If you don't want to use commands your can use drag drop also, Left side is your local computer with selected cert folder path.
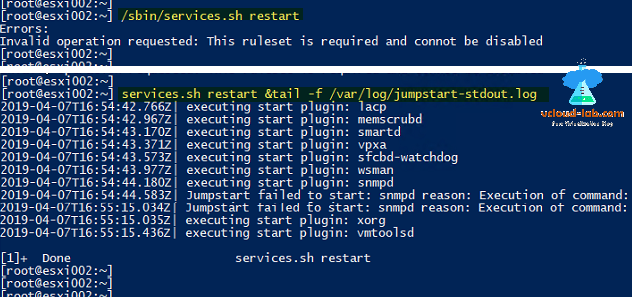
Next in case you didn't put esxi into maintenance mode and have vms running on it, but don't want to restart server, run command service.sh restart, If you are receiving errors: Invalid operation requested: This ruleset is required and cannot be disabled, use below command to perform the task.
service.sh restart &tail -f /var/log/jumpstart-stdout.log
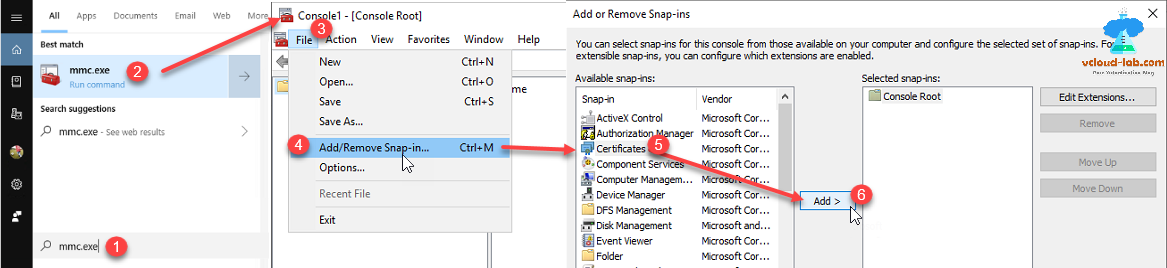
Next adding the CRT file to jumpbox's local computers certificate's Trusted root certification authorities node. Search for mmc.exe on cortana search bar, from file menu click Add/Remove Snap-in.... From available snap-ins select Certificates and click Add button.
For using group policy to deploy certificate, check my another article Push SSL certificates to client computers using Group Policy
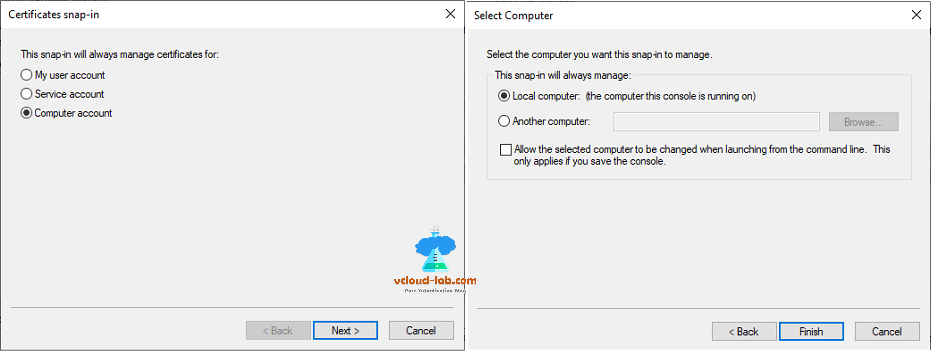
It allows you to browse the contents of the certificate stores for user, a service, or a computer. Choose Comptuer account and click next then keep selected Local computer (the computer this console is running on), press finish.
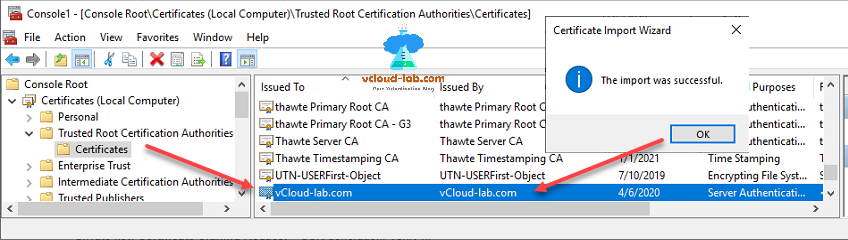
Here on the selected snap-ins you will see Certificates (local computer) is added. On the next console expand certificates (Local Computer) then choose Trusted Root Certification Authories >> Certificates folder from list, right click on Certificates in the All Tasks >> click Import.

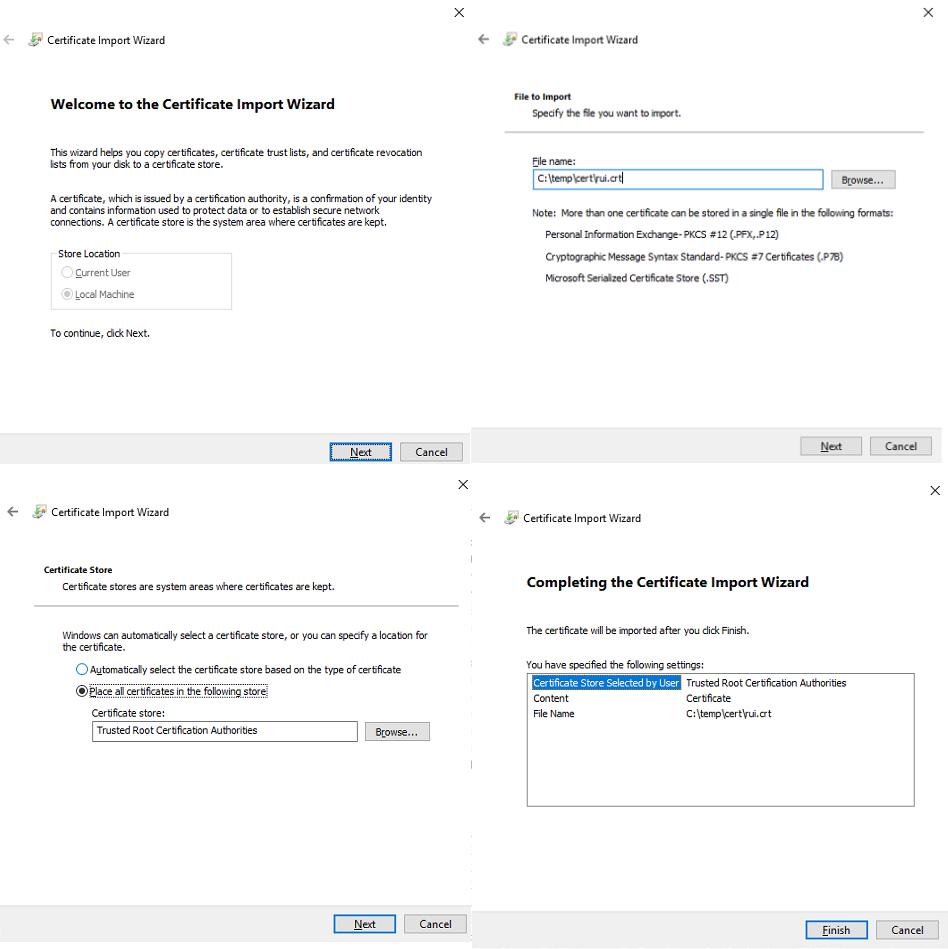
New Certificate Import Wizard launches, on the welcome page click next, On the File to import browse and select rui.crt file earlier created. Certificate store should be by default selected as Trusted Root Certification Authorities. on completing wizard review your settings and press finish.
Once the import is successful, esxi certificate should be visible in the list.
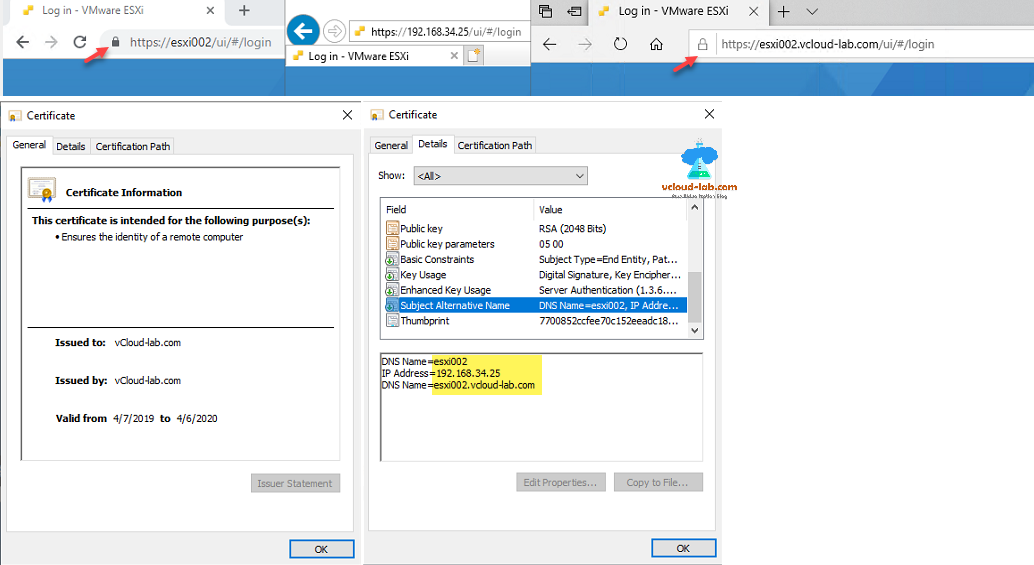
This is last step to verify certificate is valid now, Open chrome or ie or edge, clear history and cache, and try DNS or IP of esxi in the browser, All should be ok with locaked padlock icon and no error, if you view certificate information no yellow warning sign as the first screenshot in this article.
Useful Articles
VMWARE SECURITY BEST PRACTICES: POWERCLI ENABLE OR DISABLE ESXI SSH
vSphere ESXi security best practices: Time configuration - (NTP) Network Time Protocol
Configure syslog on VMware ESXi hosts: VMware best practices
Configure SNMP on ESXi Server GUI :Vmware Best Practices
