NFS (Network file system) is a distributed file sharing solution for diversified cross platform environments. It was originally designed to run on Sun solaris, This also supports and works well on windows and non-windows computers. NFS uses RPC and usually use Port (TCP and UDP) 111 and 2049. There are also ports for Cluster and client status (Port 1110 TCP for the former, and 1110 UDP for the latter) as well as a port for the NFS lock manager (Port 4045 TCP and UDP). In most of the environments NFS is configured in Linux as file share.
Warning: Windows NFS server is not listed on VMWare HCL as Esxi NFS datastore. I am using it as a demo purpose.
MICROSFOT WINDOWS 2012 R2 ISCSI TARGET STORAGE SERVER FOR ESXI AND HYPERV
Microsoft Powershell: Windows 2016 Install and configure NFS server
Add NFS datastores to VMware ESXi hosts using PowerCLI
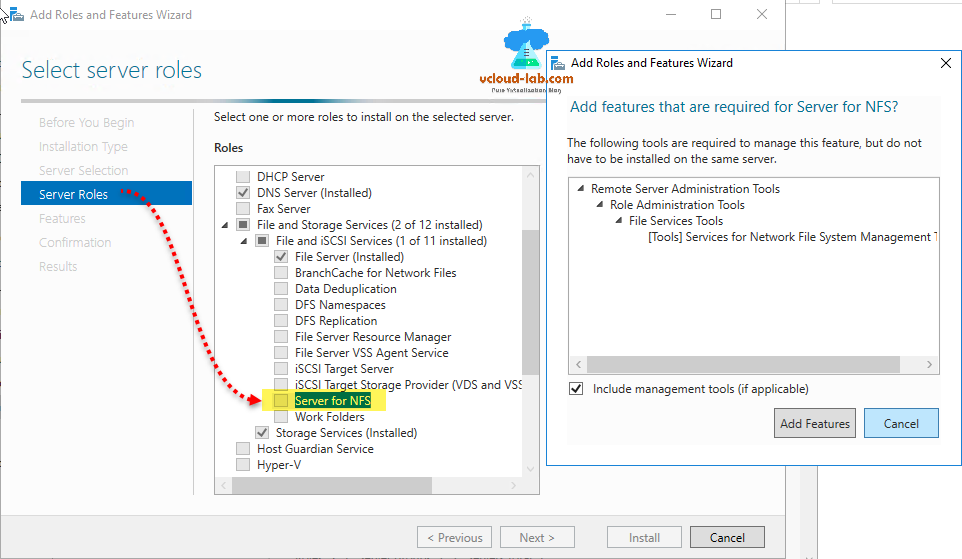
Here in this article I will setup one NFS server on Microsoft Windows server 2016. To install this role Open server manager, Click on Add roles and features (Manage). After clicking next on Add roles and features wizard with all default options, once you land on the Server Roles page, expand roles File and Storage services >> File and iSCSI Services and locate Server for NFS. Once you check the box it ask for for add features that are required for server for NFS, click Add features.
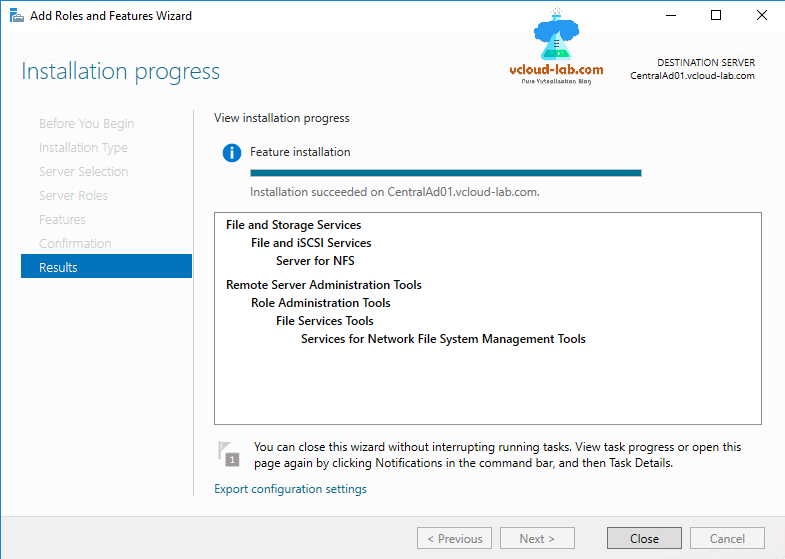
After clicks on next with keeping default options, finish the feature installation and configuration. It takes few minutes to complete setup.
In next article I have mounted this NFS drive on Esxi - Microsoft Windows 2016 Install and configure NFS server for ESXi and Linux and Mount NFS share to multiple ESXi hosts.
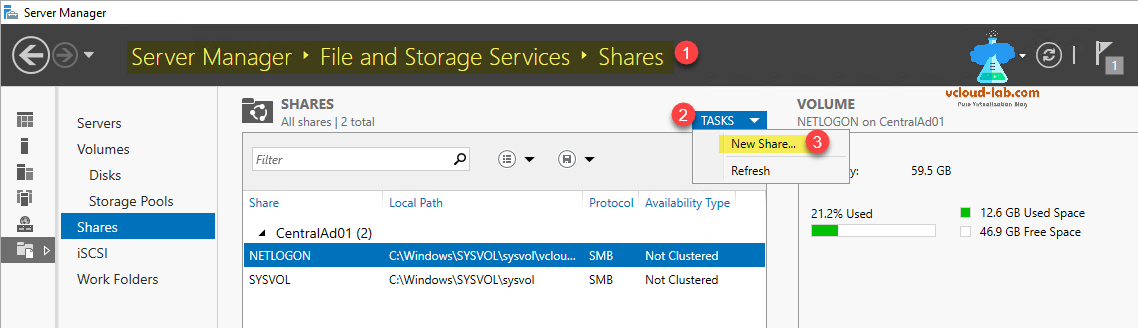
After installing NFS server role successfully, Its time to configure new NFS Share, for configuration go to Server Manager, then File and Storage Services, on the Shares box, Click Tasks from drop down box click New Share. This launches New share wizard. On the right side It gives me insight about volumes with drive space and I can plan for creating shares.
On the New share Wizard, Select the NFS Share - Quick Profile for this share. This describes as The basic profile represents the fastest way to create a NFS file share, typically used to share files with UNIX-based computers.
- Suitable for general file sharing
- Advanced options can be configured later by using properties dialog
Click next.

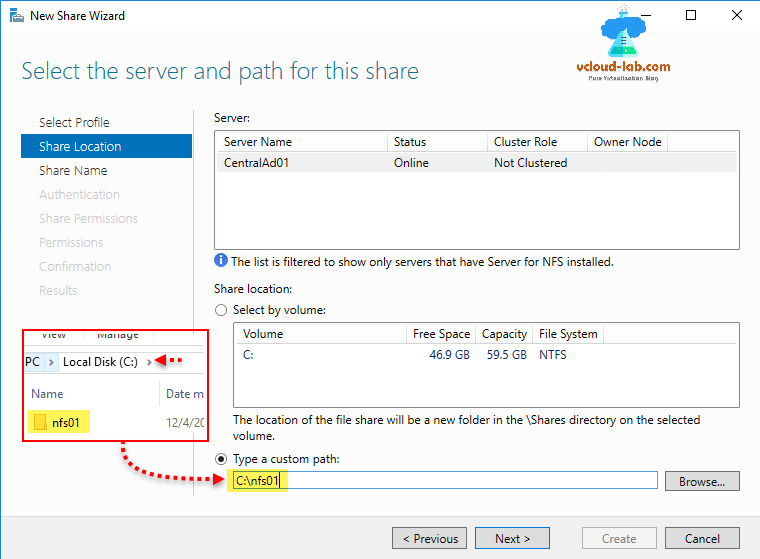
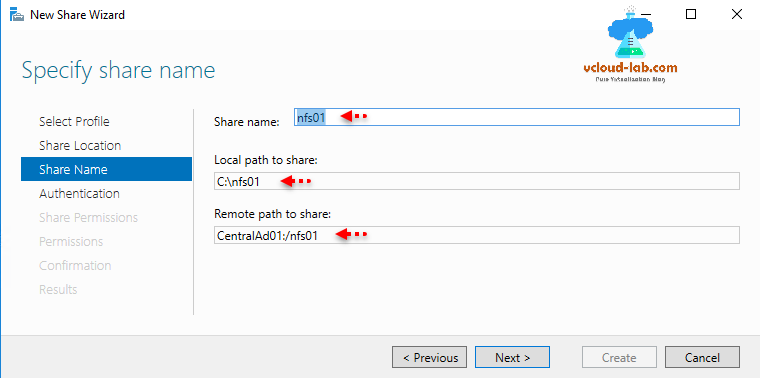
I have already created a folder on c:\nfs01. On the same path I will be creating NFS share. either browse and select the path or Type it under custom path.
This is important stage of configuration, Provide the share name (I am keeping same as folder to avoid any confusion). Local path is c:\nfs01. Next note down Remote path to share. This will require in next articles. Generally this is a fqdn_Or_ip:/nfs01.
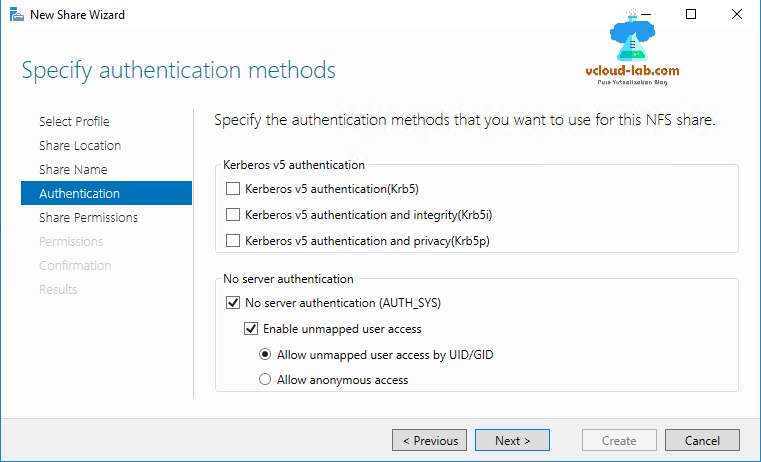
On the No server authentication box specify the authentication methods that you want to use for this NFS share, check the boxes for No server authentication (AUTH_SYS), then Enable unmapped user access and select Allow unmapped user access by UID/GID. this will add require authentication while accessing servers.
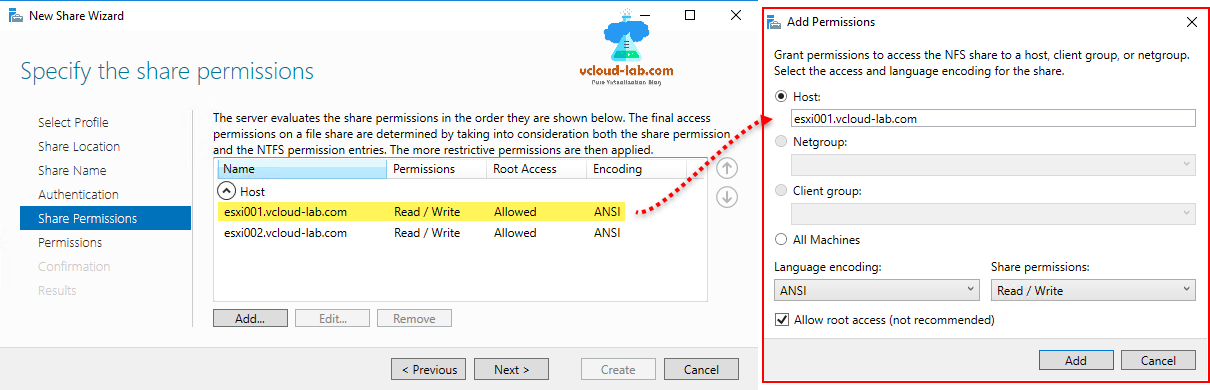
The server evaluates the share permissions in the order they are shows below. the final access permissions on a file share are determined by taking into consideration both the share permission and the NTFS permission entries. the more restrictive permissions are then applied.
Click Add button to add permissions. In next articles I am using this blog to show how to add and mount same NFS share on esxi server as datastore. Next I will be adding esxi host fqdn or ip in Host, Share permissions should be selected to Read/Write, and check the box of Allow root access.
In next
Permissions to access the files on a share are set using a combination of folder permissions, share permissions, and, optionally, a central access policy. Next in the wizard, don't need to add or modify permissions, keep it default and press next.

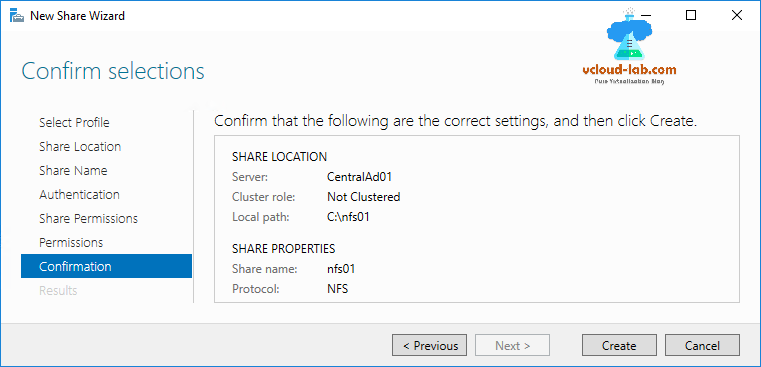
On the Confirm Selections page verify all the settings are correct and click to create share.
This takes few minutes (depending on the files in the folder) and check the progress and status of Create NFS share and set NFS permissions.
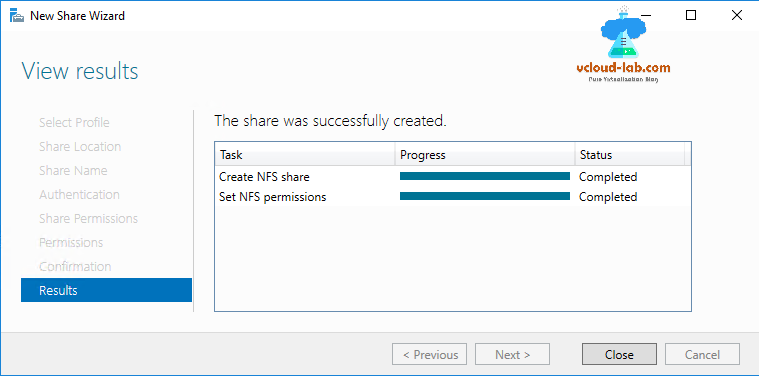
Finally NFS share will be listed with protocol NFS and in the next if you need to add hosts in permissions list. Right click nfs share, go to properties and make the necessary changes for later use.

Useful articles
VMWARE ESXI INSTALL AND CONFIGURE SOFTWARE ISCSI STORAGE ADAPTER FOR VMFS VERSION 6 DATASTORE
POWERCLI VMWARE: CONFIGURE SOFTWARE ISCSI STORAGE ADAPTER AND ADD VMFS DATASTORE
POWERCLI: VIRTUAL MACHINE STORAGE MIGRATE/SVMOTION AND DATASTORE PORT BINDING MULTIPATHING
PART 1 : INSTALLING ESXI ON VMWARE WORKSTATION HOME LAB
Unmount NFS datastores from VMware ESXi and NFS is in use
