PART 1 : INSTALLING ESXI ON VMWARE WORKSTATION HOME LAB
PART 2 : CONFIGURING ESXI ON VMWARE WORKSTATION HOME LAB
PART 3 : ACCESSING STANDALONE ESXI SERVER IN HOME LAB USING VSPHERE CLIENT
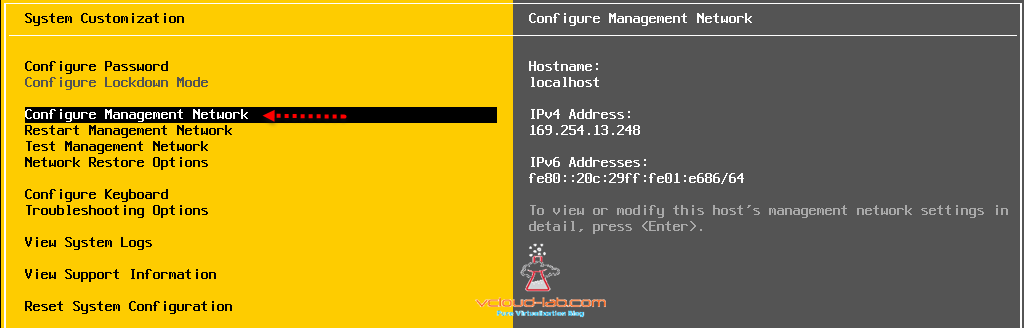
ESXi Server is installed and ready on VMWare Workstation for further configuration, as there is no DHCP, it doesn't have any valid IP (in the absence of DHCP it acquires APIPA IP address), assigning static IP is easy and it is recommended to configure static IP on ESXi server. On the DCUI (Direct console user interface), press F2 key to login. Use the same root password while entered installation.

There are few options on ESXi console we need to configure to bring it on the network. We are looking for configure Management Network, scroll on it and press enter. On the right side we can see the current network configuration summary.
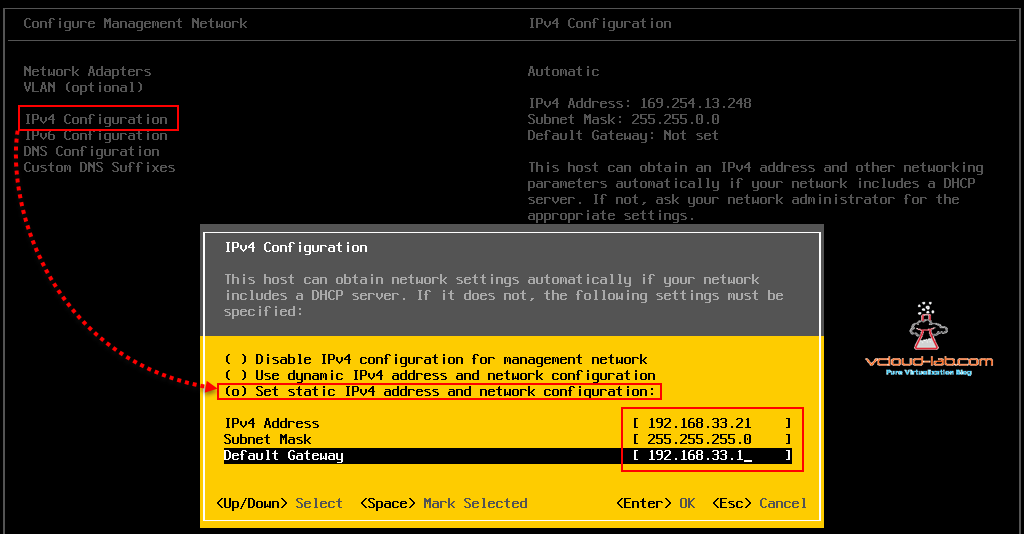
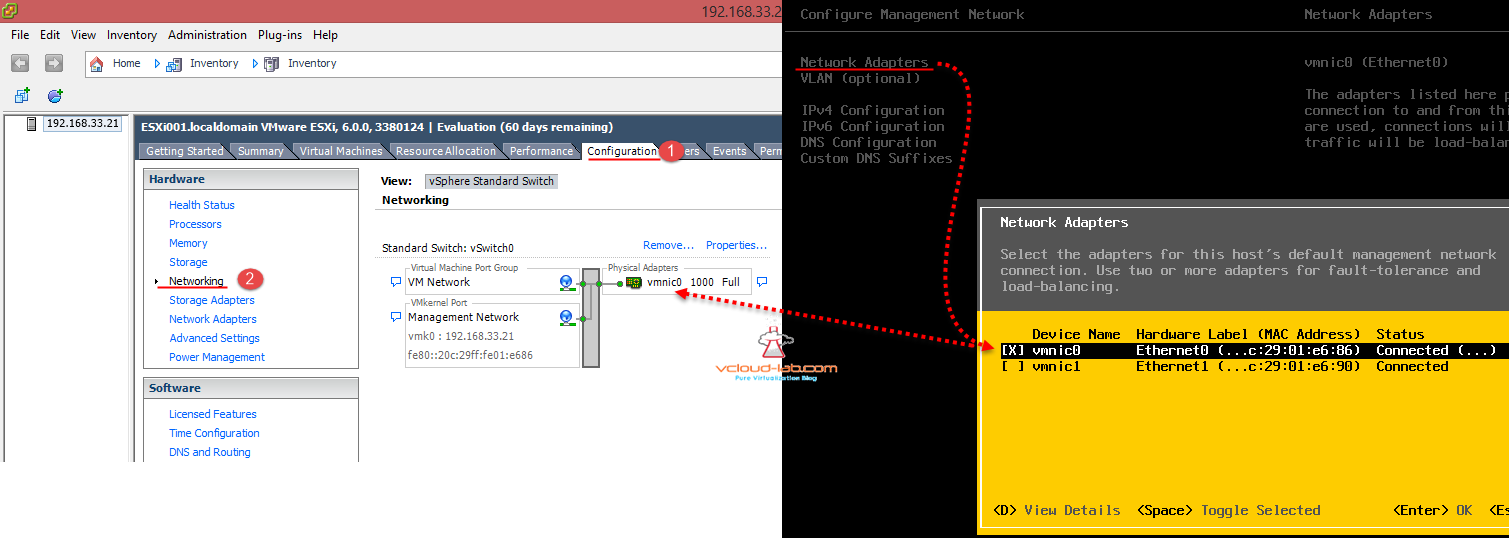
There are multiple option in networking to configure. first is Network Adapters, Currently I have 2 ethernet cards in this ESXi server, by default selects first NIC card, so I won't be editing here. next is VLAN (optional), In this VMWare Workstation Lab, I don't have VLAN configured, This is also used for segregating network ports. I didn't find the way to configure real world trunk port in VMWare Workstation networking so I have came to conclusion VMware Workstation doesn't support VLAN Trunks, so I will be leaving this option as it is.
Next option is IPv4 Configuration, Select set static IPv4 address and network configuration (go to this option and hit space button to select it), Assign static IPv4 Address and hit enter button.
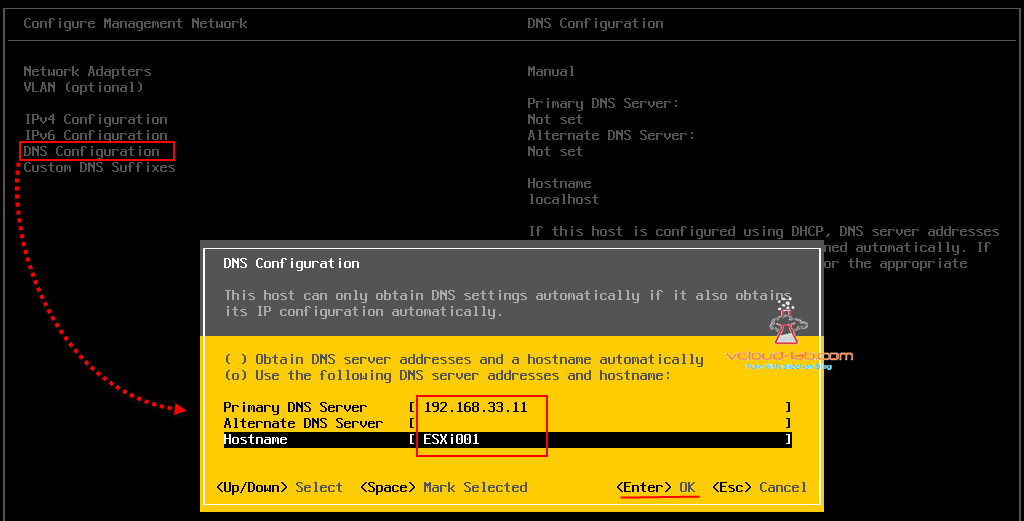
Next DNS configuration, In my lab I only have one Windows DNS server (also an Active Directory Domain Controller). 192.168.33.11 IP belongs to the AD server and Hostname is same VM Name as per my naming convention as per below screenshot. it is best practice to configure DNS server address on ESXi. I have added one A resource record entry for this ESXi host in DNS Server also.
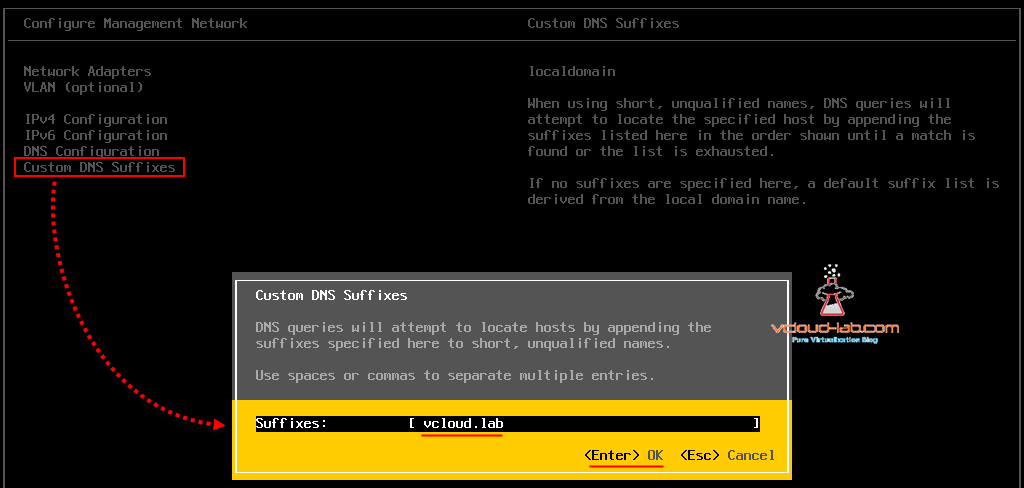
Custom DNS Suffixes is nothing but your domain name for name resolution, DNS queries will attempt to locate hosts by appending the suffixes specified here to short, unqualified names. If you have multiple domains in you environment you can add those all domain separating by spaces or commas.
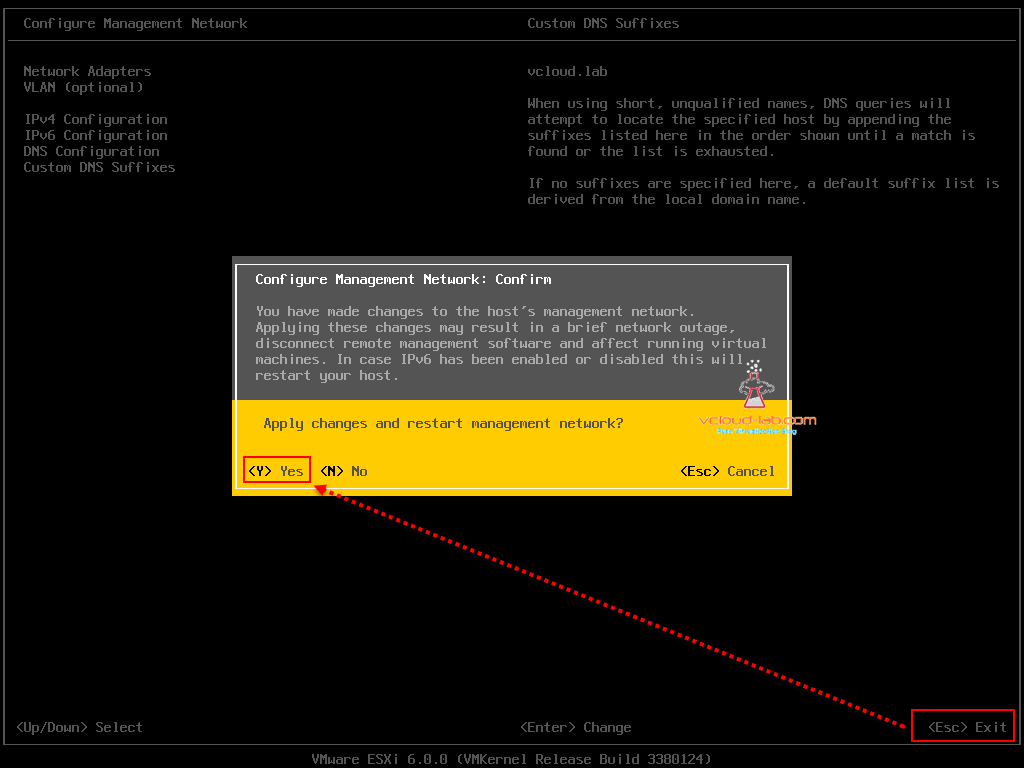
Networking configuration on Esxi is is done to apply setting we will need to restart management agent, after your above suffixes configuration press enter and then press ESC key. it will pop up to apply setting will restart management network. When you perform these steps on production be careful while restarting management network, it could lose network connection. Also if you have disabled IPV6 Host will reboot.
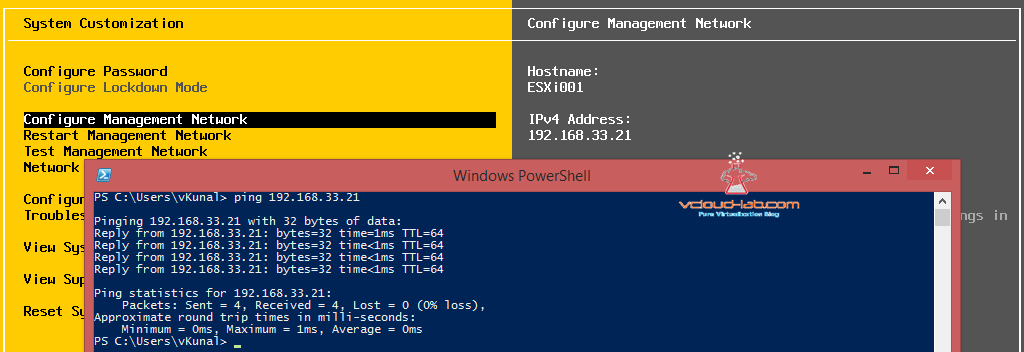
If everything is good you will see the IPv4 Address on the DCUI screen and VM should be pingable from other machines now. Our basic ESXi networking is configured successfully, next blog will be about using vSphere client and vSphere Web client to login into Esxi.
If you see there is one vSwitch created automatically and how is the connection looks in GUI and DCUI, This is just a mapping.
Another useful blogs
INSTALLING AND CONFIGURING ESXI EMBEDDED WEB CLIENT
